
My first attempt at this sat on my desk looking less like a digital block and more like an overproofed loaf of soda bread. The corners bowed outward, the pixel steps slanted at an ugly forty-degree angle, and the whole thing collapsed when I dropped a stapler into it.
The fix was brutal on my wrists: drop down to a 5.0 mm hook with Chunky yarn and never let go of tight working tension. Chunky yarn wants to create soft, squishy fabric. You have to bully it into becoming a piece of structural architecture.
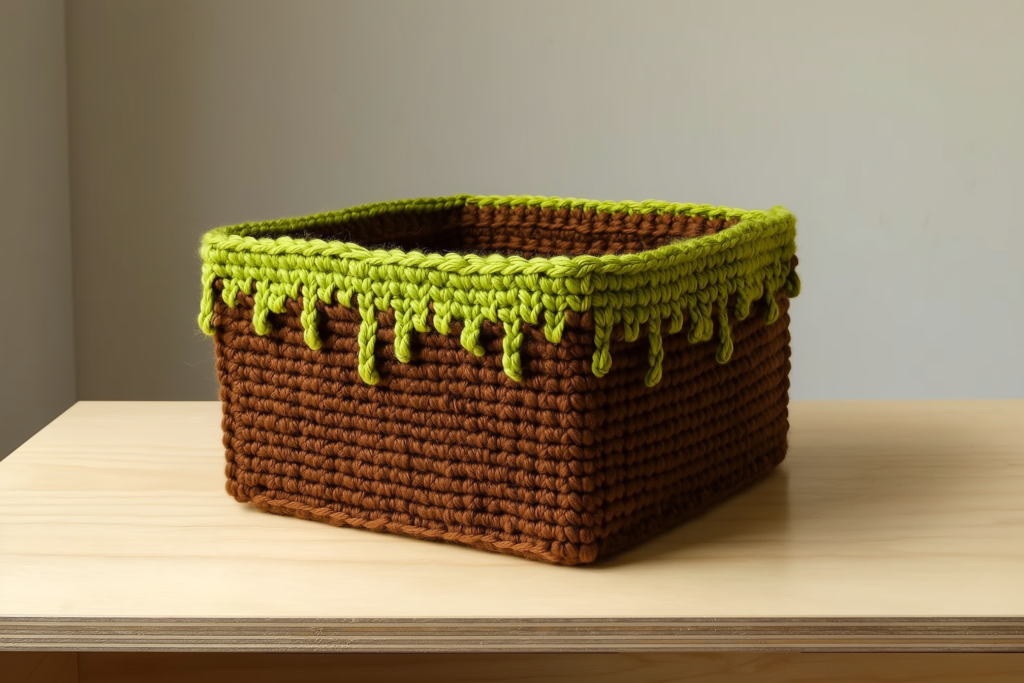
Pattern directions below use UK crochet terminology throughout. Keep in mind that a UK double crochet is worked identically to a US single crochet.
What you will make
- Finished tub measures approximately 20 cm wide by 20 cm deep, standing 18 cm tall.
- Worked in tapestry crochet using UK double crochet in the round.
- Intermediate skill level: holding even tension while carrying thick yarn inside stitches requires steady hands and patience.
- Expect 8 to 11 hours of active hook time.
What you need
- Chunky (weight 5) yarn in three colours: Dark Earth Brown (approx. 220–250 m), Bright Pixel Green (approx. 90–110 m), and Olive Green (approx. 40–50 m). Actual meterage varies with tension.
- 5.0 mm (H-8) crochet hook.
- Four locking stitch markers to anchor the four corner points.
- Tapestry needle with a blunt tip and an eye wide enough for chunky plies.
How to make it
1. 1. Gauge check and base setup
Gauge is non-negotiable for this piece: 13 double crochet stitches and 14 rounds over 10 cm worked tightly in double crochet. If you get 11 or 12 stitches, drop down to a 4.5 mm hook or the sides will belly out under their own weight.
Using Dark Earth Brown, start with a magic ring. Round 1: Ch 1 (does not count as a stitch throughout), work 8 dc into the ring. Join with a slip stitch to the first dc. Pull the tail until the hole is completely sealed. [8 sts]
2. 2. Working the flat square base
To keep corners sharp instead of rounded, we build each corner with three stitches worked into the exact apex stitch. Round 2: Ch 1, 1 dc in first st, 3 dc in next st (place marker in middle st). *1 dc in next st, 3 dc in next st (place marker in middle st)* three times. Slip stitch to join. [16 sts]
Continue expanding the base for 13 rounds total. On each round, work 1 dc into every straight stitch and work 3 dc into each marked corner stitch, moving the marker to the centre stitch of each 3-dc cluster as you go. Round 13 finishes with 27 dc per side plus the 4 corner points. You will have 112 stitches total. The square should measure precisely 20 cm across.
3. 3. Turning the 90-degree ridge
Do not turn your work. Round 14 creates the bottom edge shelf that forces the walls upright. Ch 1, work 1 dc into the back loop only (BLO) of every single stitch around. Do not increase. Do not work 3 stitches into the corners.
Stop at the end of this round and run your finger along the ridge. You now have an exterior raised lip and exactly 112 stitches sitting squarely on the perimeter. Slip stitch to join to the first dc.
4. 4. Building the plain dirt walls
Rounds 15 to 22 are worked through both loops in plain Dark Earth Brown, but you must work them in a continuous spiral rather than joining with slip stitches. A joined seam will slowly drift diagonally across one face of your cube, ruining the voxel illusion. Place a running scrap of waste yarn at the start of Round 15 to track rounds.
Work 1 dc in every stitch around for 8 rounds. Keep your corner stitches snug; pull the working yarn firmly on stitches 1, 28, 56, and 84 to keep the fabric creased where the corners climb.
5. 5. Introducing the pixel grass drip
At Round 23, join Bright Pixel Green and Olive Green by laying the strands along the tops of your stitches and encasing them inside your Brown stitches. You are now working tapestry crochet across 112 stitches, which divides into four 28-stitch faces.
Each face repeats an identical 28-stitch colour block: 4 Brown, 2 Olive, 3 Brown, 5 Bright Green, 2 Olive, 4 Brown, 8 Bright Green. On colour changes, pull the new colour through the final two loops of the preceding stitch. Keep unused colours trapped flat against the top edge; do not let them balloon inside.
6. 6. Stepping the pixels across the upper rim
Rounds 24 to 28 progressively expand the green and reduce the brown to mimic the hanging jagged turf blocks. For Round 24: [2 Brown, 3 Olive, 2 Brown, 7 Bright Green, 3 Olive, 2 Brown, 9 Bright Green] across each 28-stitch face.
For Round 25: [1 Brown, 4 Olive, 1 Brown, 9 Bright Green, 2 Olive, 1 Brown, 10 Bright Green]. For Rounds 26 to 28, drop the brown completely; work blocks of 6 Bright Green and 1 Olive, ending with Round 28 entirely in Bright Pixel Green to establish a solid grass border. Fasten off secondary colours inside the stitches on Round 28.
7. 7. The stiff rim finish
A floppy opening ruins the cube geometry. Do not work a normal round of slip stitches; they slant inward. Instead, work a round of reverse double crochet (crab stitch) in Bright Pixel Green through both loops, moving clockwise.
Crab stitch forms a firm, corded bead around the opening that locks the perimeter against sagging. Cut yarn leaving a 15 cm tail, thread onto a tapestry needle, weave the tail down into the interior posts, and trim cleanly.
Tips to get it right
- Tug carried yarns lightly every ten stitches; chunky yarn slack inside stitches causes messy, puckered bumps that look like mistakes on the outside.
- Count the stitches between corner markers on the base every single round. Adding a stitch to one side and missing it on another skews the bottom into a trapezoid that cannot be blocked out.
- Do not drop your hook size below 5.0 mm if you tend to crochet very tight; it will cause the carried yarns to buckle and snap under pressure.
- When carrying three chunky strands, twist the skeins once every two rounds to keep the working feeds from tangling into an unrecoverable knot.
What goes wrong
The base corners start curling inward and the bottom resembles a shallow boat instead of a flat square. You missed the middle stitch on a 3-dc corner cluster, working your increases into stitch one or three. Rip back to the first round that curls, count each side precisely, and ensure your three corner stitches sit directly inside the centre post of the previous round’s trio.
The pixel drips lean sideways at a sharp angle instead of standing as clean, vertical digital blocks. Standard crochet stitches lean naturally to the right (for right-handers). To keep tapestry pixels blocky and vertical, work your double crochets as yarn-under instead of yarn-over when pulling up the first loop. This stacks the stitch legs directly over one another.
Finishing
Steam blocking is essential to set the four upright corner folds. Do not let the iron plate touch acrylic chunky yarn, or the plies will melt instantly into shiny plastic glaze.
Stuff four thick books inside the basket to push the four walls into flat planes. Hold a steam iron five centimetres away from the fabric, soaking the corners in hot vapour. Let the basket cool completely over four hours with the books still inside before you touch it.

Leave a Reply